


Well Hello there!
Better late than never, I guess. While the rest of the world was out shooting with their Sony a7rII cameras, I was sitting home waiting on the delivery man. I finally got it and have been shooting here and there with it now for about a week. As I stated in the opener Review page, this will not be an overly technical review. I will dip here and there but I am no scientist. What you will get here is my honest opinion on how it works for me, a travel photographer first, and an all around photographer second. Keep that in mind when reading and viewing on.
An Easy Step.
So it should be worth noting, I have been a Sony shooter since the release of the a100. I then moved to the a200, a500, a55 DSLT, a77 DSLT, a99 DSLT, a7r mirrorless, and now to the a7rII. I have traveled the road of mockery for being a Sony shooter and learned from it. I learned to not pay attention to that sort of thing nor perpetuate it. In the end, it is about the photographer and how she/he uses their tools. Yes, we need quality tools, but I am going to out on a limb here and say that if you stick with the solid names in the camera world, and you are finding serious fault, you might want to look within first. Sony, Canon, Nikon, Lumix, Fuji, Olympus, and Leica are all putting out killer products all with different features. Some with more than others, but all of them have one thing in common, you CAN make amazing photos with them. I started with Sony because well, I was a beginner without a lot of money. I felt Sony knew what they were doing when they acquired the Minolta name and trusted they would do good things with it. There were a lot of tough times in those early years. But I think for me, if I didn’t have some of those equipment short comings, I wouldn’t have become as versatile as I am today. I stuck with Sony because like a lot of folks you invest your time into learning the camera and your money into the expensive stuff, the glass. By staying with Sony, I was able to maintain my glass and not lose my investment. This is very important to most folks I believe and is the #1 reason for brand loyalty. Having spent nearly a year on the Sony a7r, I was fairly at ease with the a7rII. Basically, it is just an a7r on steroids. The more I delve into it, the more I realize it is much more than that. Lets talk.
Hey, What’s in the Box?
Well I am not one for un-boxing videos…or un-boxing reviews even…but there was a surprise in the box worthy of a little talk-about. While I LOVE Sony cameras, they have always been a bit stingy with accessories. Even up to this year they weren’t doing much with photographers and paring up with them. So I was really happily surprised when I looked in the box and saw not only a nice compact charger for the USB port on the camera, but a standalone wall charger and not one but TWO batteries!

Kudos to you Sony for finally stepping up in that department. As for the rest of the fare, also included is a simple Sony a7 emblazoned camera strap, hot shoe cover, a special cable restraint adapter (another nice touch for the video guys), and decent simplified manual in several languages. All-in-all a nice surprise right out of the box.
Okay, Tell Me About The &%$# Camera!
Okay, but remember…first impressions. There will be more as I get to use this thing in the real world a bit. First thing out of the box you notice is that the a7rII is quite a bit beefier than the a7r. It is heavier too. While the a7r comes in and svelte 14.4 ounces, the a7rII rings in at 151 grams more or 19.8 ounces. So where the a7r was under a pound, the a7rII is over. Compare that to my a99 full frame though blundering in at 25.9 ounces and also having a battery grip weighing twice as much and we are looking at quite a difference.

The a7rII is not that much thicker than the a7r. At first it looks to be but then you notice that it is the way the LCD is set into the back that makes the difference. The difference ends up being around an 1/8 of an inch difference. Most notably the body itself is not the shiny sleek look of the a7r. The a7rII has a pebble finish and is much beefier feeling to the hand. I like the feel of the a7r although at first sight I thought it would be too small for my fists of ham. It turned out to be nice, but the a7rII fits perfectly. It’s bigger in all the right spots for me. Just one of many improvements I have found with this mark II. Here is a set of “walk around” photos comparing the a7r (left) to the a7rII (right).


Okay, So What If I Never Owned an a7?
That is an excellent question Watson! So probably the greatest single feature for me on the a7rII is it’s adaptability. Being mirrorless there is a large chunk of space that is not needed. This moves the lens mount closer to the sensor. Downside is, Sony is playing catch-up making new lenses for the a7 line. Upside is, while you wait there are literally tens of thousands of other lenses out there you can use. There are dumb adapters (manual everything) for just about every film camera system made. And most of the better quality adapters are under $25.00. This means you can go absolutely hog wild with vintage glass.Most of which is much higher quality than a lot of the lenses made today. (look for my best buy reviews coming soon) Gems can be found from about $35 up. And if you are savvy enough to check your local rummage sales and hock shops you will find even better bargains. I am also happy to say that for you Canon and Nikon folks that have been waffling on making the switch, the a7rII has gotten it right! Outfit the a7rII with the appropriate metabones adapter and you will see full aperture and auto-focus control with no lag! That’s right, reports are in that the slight lag that the a7r and earlier models experienced is now non-existent. The metabones will set you back anywhere from 100-500 bucks, but its a pretty good bargain to keep all your current invested glass complete with full functionality.
Alright, What Else Ya Got?
Well all of the familiar features of the a7 system are still in place, many with super boosted mutant powers. You get standard NFC transfer to your phone for social media sharing, full PlayMemories app functionality through wifi, Infrared remote control, wifi remote control using Playmemories remote (free app on iOS, Android, and Windows), and card-less shooting to the app as well albeit in jpeg only you could use it in a pinch. The a7 series menus will be very familiar to any users of previous Sony’s but to the new user they can be a bit daunting at first. I suggest putting the camera in tile mode which starts you out with big icons and most functions sorted neatly behind each tile. This a7rII is a monster when it comes to options though. I am not going to try to cover them all here in text. I will save that for the video. So far battery life seems to be as good as the a7r, which is not great. But, the batteries are small and 3rd party batteries are cheap and for the most part just as good. I generally bump charge the cheaper cells which is not the greatest for them, but it does get the most shoot time out of them and I haven’t had any troubles at all with doing it. Bumping only seems to work with the Sony wall charger and I would never attempt it while the battery was in the camera. Essentially, you charge the battery until the light goes out, pull the battery and then put it right back on. It will charge for another 15-20 minutes and then do it again. You keep doing this until the charge light goes out in about 10 seconds. Then you know your battery is at full capacity. ONLY do this with non-Sony batteries though.
Let’s Talk about Everyday Use
One of the most talked about and sometimes controversial features of the a7 system has been the Electronic View Finder or EVF. Because the mirroless system is, well, mirrorless, light comes through the lens, into the sensor and then that data is fed off to the EVF and to your eye. In a DSLR light comes through the lens, off a mirror, through a prism and into your eye done at the speed of light. All of this electronic stuff of course takes a wee bit of time, light converted to data, converted back to light, blah, blah, blah. In previous a7 systems there was a bit of lag which when moving around and looking through the viewfinder that made you feel more drunk than you actually were. Enter the new XGA OLED viewfinder coupled with optics by Zeiss and you end up with a Houdini of an EVF. Utilizing a quick-transmission copper wiring layer on the sensor speeds output data 3.5 times faster than previous versions. The end result is an EVF that can fool you into believing it is full optical. Yay for no more overly drunk photographers! All of this really means that this camera is much easier to manual focus. Even without using the Matrix style focus peaking. A feature I still do not completely trust. The biggest problem I had with the 36megapixel a7r was getting manual focus tack sharp. It seemed to be really picky to me. Whether it’s the new EVF or the backlit sensor, I don’t know but the a7rII is much easier for me to nail manual focus on. I love using old manual lenses with these cameras and now it’s even more fun when I know I can actually focus them.
Pictures, Show Me Pictures!
Yes, I have actually taken some photos with the camera. Some of them even caused quite a stink over on facebook because I failed to shoot them in a sterile environment in a hazmat suit while calibrating my tripod with a micrometer. What I will show here are some shots that stand out to me and why I was impressed with them. The following image was shot using the Sony LA-EA4 Alpha to E-Mount adapter. Full auto-focus, ISO800, 90mm, f/8 @ 1/1600th sec. The lens, a Quantaray 28-90mm Macro, was a $10 rummage sale find!
-


Full Frame ISO800 90mm 1/1600 f/8 1:1 Zoom
Same lens and settings:
-


Full Frame ISO800 90mm 1/1600 f/8 1:1 Zoom
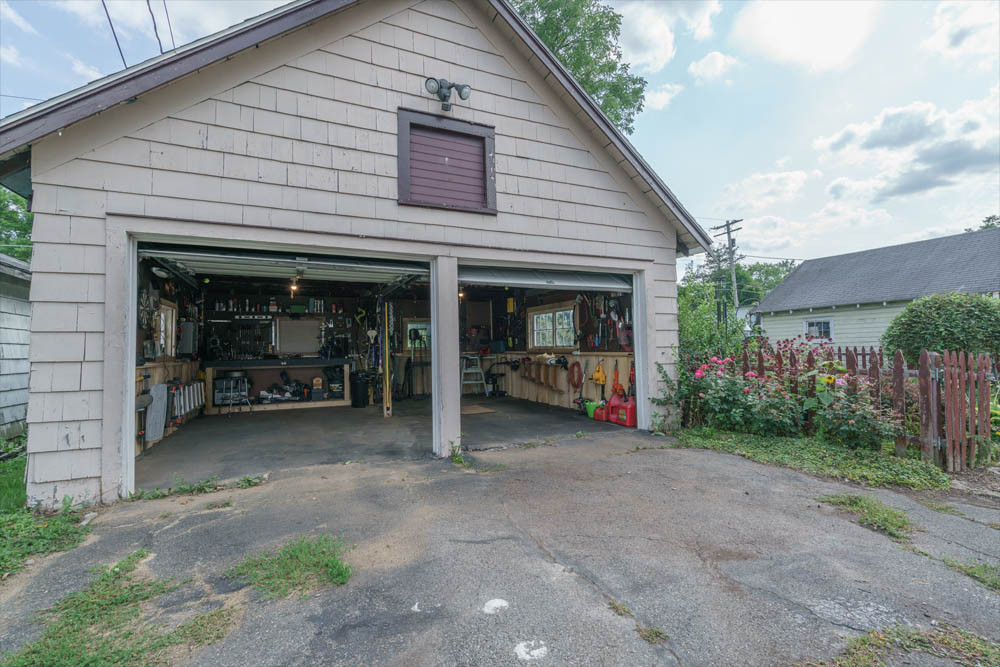
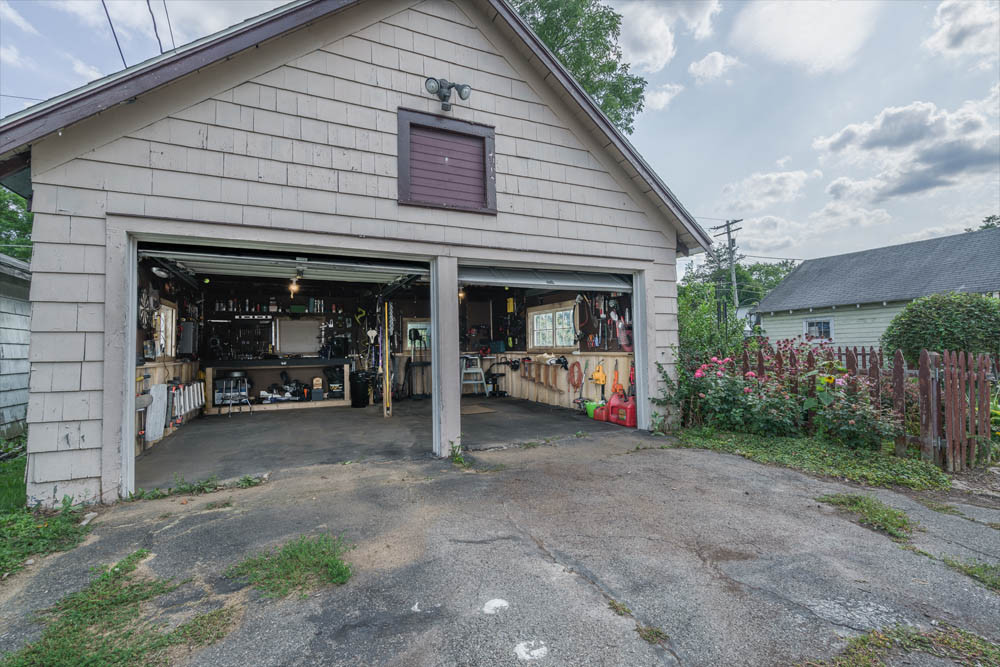
So 1:1 at ISO800 you can see that the noise performance is quite good. Let me be clear on my stance with noise. Noise is NOT always bad. I have seen cameras with color noise that is horrible, but I find that contrast noise can be quite pleasing. That said, at web resolutions of 2650 pixels long edge noise all the way to ISO6400 is not going to be an issue at the default crop. I have not done any print testing yet, but I think it is safe to assume from the 1:1 crops I have looked at that ISO3200 should yield very pleasing results up to 24 inches by 36 inches, maybe even larger. I think it all depends on what you are going for. I have always found that the noise in the Sony cameras to have a film grain quality up to a point. Anything beyond that point is going to take some serious work to be usable. And remember, I am talking straight out of the camera here with no noise reduction. There are plenty of great tools to deal with noise as well is a pretty solid long exposure noise reduction routine right in the camera. All numbers aside, I am extremely happy with the low light performance of this camera. And while this may not be anything new to Canon 5DmkIII or Nikon 810e owners, it is a long time coming for Sony owners to be able to dive deep into the ISO pool and come up with some serious treasure. Speaking of which, Timer plus EV Bracketing and up to 9 Exposure bracketing has been begged for since the a100 days and I am elated to say with the Sony a7rII that it has arrived! Yes, you can now capture extreme dynamic range with up to 9 brackets at 1 EV spacing. For someone who has never liked allowing the software to fill in the HDR blanks, this is GREAT news. I shoot in a lot of locations where the light is less than optimally balanced. For instance, in an old abandoned building with bright sunshine coming through the windows. These situations are extremely difficult to get right. Now I don’t always need to capture all of that light, but having the option is wonderful. Here is an example of where this type of range may be needed.
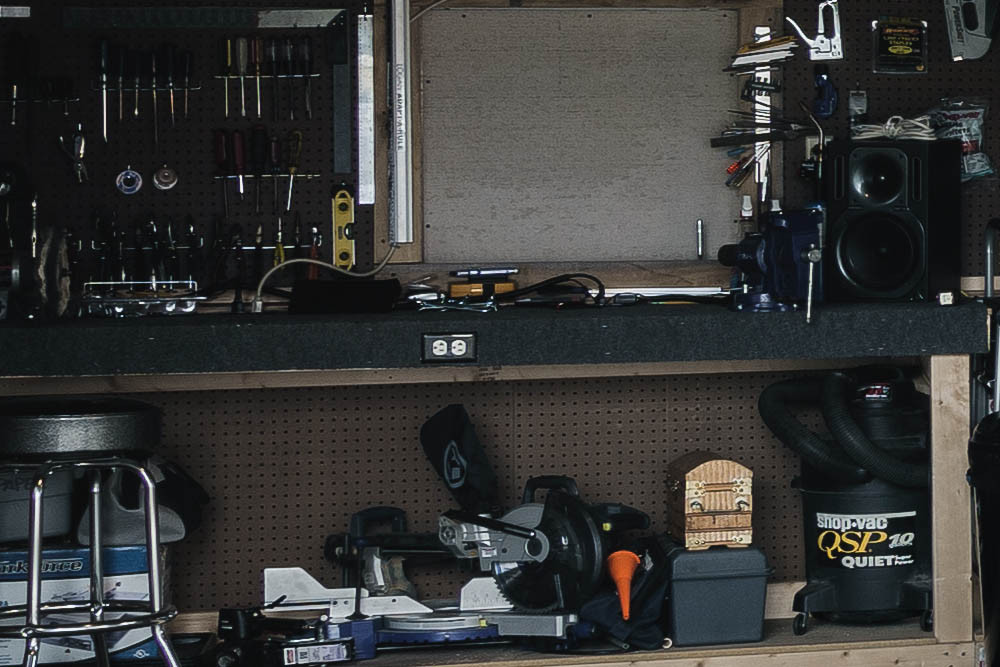
Sunny day, shooting from the exterior of my garage, to the interior. Here is as close as I could get with one exposure, using LR to expand the range as much as possible. ISO100 16-35mm Zeiss Lens @ f/8 1/125 sec exposure. Highlights -100 and Shadows +100 in Lightroom use zoom to pay close attention to noise levels in the shadows around the workbench in the garage and the highlights details in the clouds.
-
Full Frame Single Exposure 1:1 Zoom
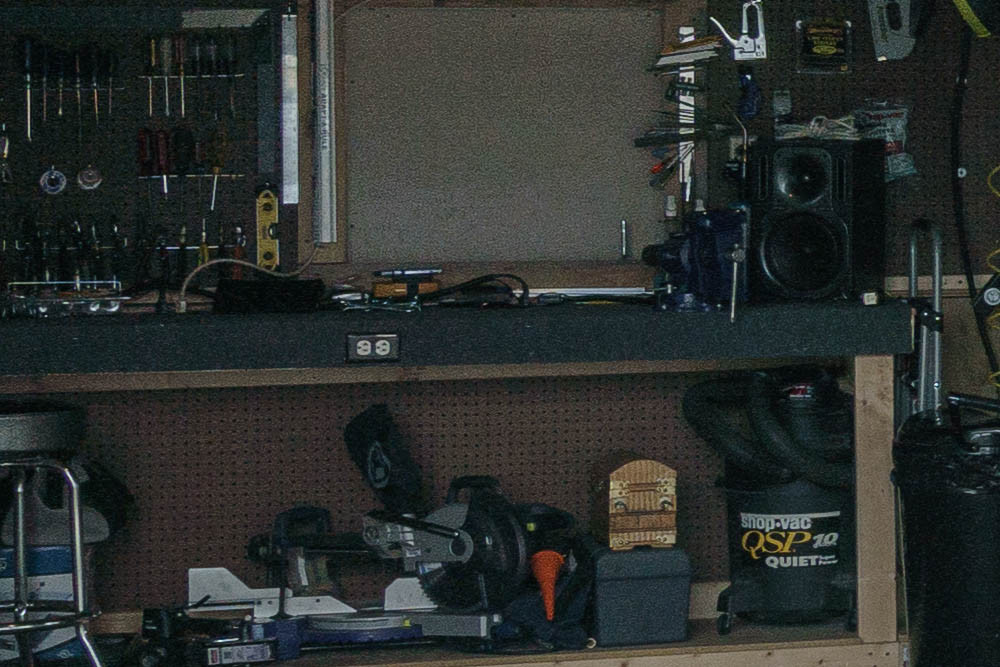
Here is the 9 bracket HDR version processed in 32bit Lightroom only. Again look at the shadows (and lack of halos in high contrast areas)
-
Full Frame 9 Bracket HDR 1EV Spacing 1:1 Zoom
Mind you I would probably not need 1:1 for this shot..but I do very large format prints of my abandonscape work and it is very important to capture detail in the shadows without noise as well as highlights without halos or being blown-out. These situations are extreme, but in the places I shoot, I run into this a lot. Nice to have a camera that can handle it.
Single shot exposures DO have a huge range though. Since moving to the a7 system I have cut down the use of HDR dramatically. It is astounding what these little cameras can capture in just 1 exposure and how even that can be expanded with the use of Sony’s built-in Dynamic Range Optimization. A great feature for single exposures but you must make sure you do not use it for capturing brackets as it will create some extremely funky artifacts when combining exposures.
First Impressions Wrap-up
Well there you have it. Is my testing scientific? No way, and to be honest, I could really care less about the numbers. CAN the Sony a7rII get the job done? YES! It is a very capable camera so far. I have done no real shooting up to this point with it. I’ve run through the garden a few times, shot the product shot at the beginning of this article with it using my Yongnuo Strobes and Transmitter. Along with just the few shots you see here, that is about it. The real test is about to come!
What’s Next
Well, how about 6 days in Yosemite and 5 days in San Francisco? I am heading to the west coast for an extended stay and should return with a pretty extensive shooting report to round out the middle of this review. Make sure you subscribe to this blog so you can be notified of new reviews, especially the follow-up to this one! Thanks guys and gals, see you soon!
Want more reviews like this one? If you do, please support this site by using my Amazon shopping code. It’s easy, whenever you go to Amazon, just use this link: http://amzn.to/1RtZKS7 Then when you buy, you get a great deal and we get a referral! Simple as that. You can click THIS LINK now and save it as your Amazon.com bookmark (Click the link and then hit CMD+D on a mac or CTRL+D on PC). Now you have the link whenever you need it. Every little bit helps! Thanks!


Add comment